Arduino CLI - 리눅스 터미널에서 아두이노 개발
아두이노에서 기본으로 제공하는 IDE를 사용하면 코드 작성, 컴파일, 업로드, 시리얼 디버깅을 한 곳에서 할 수 있습니다. 하지만 IDE없이 리눅스 터미널 만으로도 코드 작성, 컴파일, 업로드, 시리얼 디버깅을 할 수 있는 방법이 있습니다. 여기에서는 터미널 명령어 만으로 아두이노 코드를 컴파일, 업로드할 수 있는 Arduino CLI를 소개하고 방법을 설명합니다.
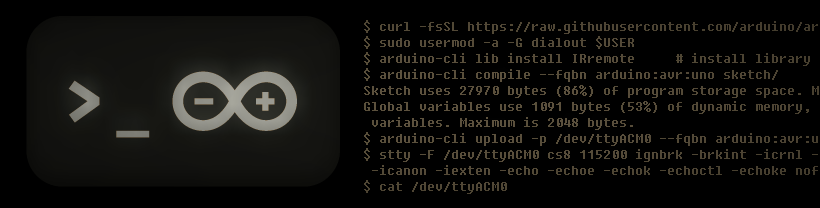
Arduino CLI
간단한 코드를 작성하는 경우라면 아두이노의 기본 IDE만으로도 충분합니다만, 소스 코드가 커지면 소스코드 내비게이션이 없어서 불편함을 많이 느낍니다. 소스코드 작성은 선호하는 에디터로 하고, 컴파일, 업로드, 시리얼 디버깅은 IDE를 이용할 수도 있습니다. 하지만 Arduino CLI를 이용하면 이 모든 것을 터미널에서 명령어로 작업할 수 있습니다.
![]()
Arduino CLI는 글을 쓰는 2020년 5월 현재 Github에서 개발이 진행중이고, GPL v3 라이센스로 코드가 공개되어 있고, 누구나 설치하고 사용할 수 있습니다. ARM CPU도 지원하여, 라즈베리 파이에서도 실행할 수도 있다고 합니다.
Ardunio CLI 설치하기
Arduino CLI는 설치 스크립트를 다운받아서 실행하는 방식으로 설치가 가능합니다. 아래 첫번째 명령은 디폴트로 ~/bin 디렉토리에 설치하는 것이고, 두번째 명령과 같이 BINDIR을 지정하여 설치 디렉토리를 변경할 수도 있으니, 둘 중 하나를 실행하세요.
$ curl -fsSL https://raw.githubusercontent.com/arduino/arduino-cli/master/install.sh | sh
$ curl -fsSL https://raw.githubusercontent.com/arduino/arduino-cli/master/install.sh | BINDIR=~/local/bin sh
아두이노는 시리얼 포트를 이용해서 호스트와 통신합니다. 유저에게 시리얼 포트의 접근 권한을 주기 위해서, 아래와 같이 유저를 dialout 그룹에 추가합니다. 그룹 추가 후에는 로그인을 다시 하거나 호스트 PC를 재부팅 합니다.
$ sudo usermod -a -G dialout $USER         # add this user to dialout group
                                           # You need to reopen the terminal or reboot the computer
$ id $USER                 # check that you have 20(dialout)
uid=1000(rostude) gid=1000(rostude) groups=1000(rostude),4(adm),20(dialout),24(cdrom),27(sudo),30(dip),46(plugdev),116(lpadmin),122(sambashare)
설치가 완료되면 다음과 같이 초기 설정을 해 주어야 합니다.
$ arduino-cli config init
Config file written to: /home/rostude/.arduino15/arduino-cli.yaml

$ arduino-cli core update-index
Updating index: package_index.json downloaded
아두이노 보드 설정
다음으로 아두이노 종류에 맞는 설정을 합니다. 아두이노는 우노, 나노 등의 종류도 있지만 값싼 중국산 클론도 있습니다. 보드에 맞는 정확한 FQBN을 알아야 합니다.
아두이노 정품 보드
아두이노 보드를 USB에 꽂고 dmesg 명령을 내리면 자기가 가지고 있는 아두이노 보드의 종류를 알아내기 위한 힌트를 얻을 수 있습니다. 아래 화면은 아두이노 우노 보드 정품의 경우 입니다. Manufacturer가 Arduino이고 시리얼 포트인 ttyACM0를 볼 수 있습니다.
$ dmesg
[ 3021.890686] usb 1-5: new full-speed USB device number 3 using xhci_hcd
[ 3022.044856] usb 1-5: New USB device found, idVendor=2341, idProduct=0043, bcdDevice= 0.01
[ 3022.044859] usb 1-5: New USB device strings: Mfr=1, Product=2, SerialNumber=220
[ 3022.044861] usb 1-5: Manufacturer: Arduino (www.arduino.cc)
[ 3022.044863] usb 1-5: SerialNumber: 8563233323635130E152
[ 3022.114039] cdc_acm 1-5:1.0: ttyACM0: USB ACM device
[ 3022.114287] usbcore: registered new interface driver cdc_acm
[ 3022.114288] cdc_acm: USB Abstract Control Model driver for USB modems and ISDN adapters
정품 우노 보드의 경우에는 auduino-cli가 자동으로 인식합니다. arduino-cli board list 명령을 내리면 아래와 같이 시리얼포트는 /dev/ttyACM0이고 fqbn은 arduino:avr:uno로 인식되었음을 알 수 있습니다.
$ arduino-cli board list
Port         Type              Board Name  FQBN            Core
/dev/ttyACM0 Serial Port (USB) Arduino Uno arduino:avr:uno arduino:avr
이제, arduino-cli core install arduino:avr 명령으로 정품 보드용 코어를 설치하고, arduino-cli board listall 명령으로 설치된 코어를 확인합니다.
$ arduino-cli core install arduino:avr      # Install Arduino:avr core
Downloading packages...
arduino:avr-gcc@7.3.0-atmel3.6.1-arduino5 downloaded
arduino:avrdude@6.3.0-arduino17 downloaded
arduino:arduinoOTA@1.3.0 downloaded
arduino:avr@1.8.2 downloaded
Installing arduino:avr-gcc@7.3.0-atmel3.6.1-arduino5...
arduino:avr-gcc@7.3.0-atmel3.6.1-arduino5 installed
Installing arduino:avrdude@6.3.0-arduino17...
arduino:avrdude@6.3.0-arduino17 installed
Installing arduino:arduinoOTA@1.3.0...
arduino:arduinoOTA@1.3.0 installed
Installing arduino:avr@1.8.2...
arduino:avr@1.8.2 installed

$ arduino-cli board listall                 # Confirm the installation
Board Name                          FQBN
Adafruit Circuit Playground         arduino:avr:circuitplay32u4cat
Arduino BT                          arduino:avr:bt
Arduino Duemilanove or Diecimila    arduino:avr:diecimila
Arduino Esplora                     arduino:avr:esplora
Arduino Ethernet                    arduino:avr:ethernet
Arduino Fio                         arduino:avr:fio
Arduino Gemma                       arduino:avr:gemma
Arduino Industrial 101              arduino:avr:chiwawa
Arduino Leonardo                    arduino:avr:leonardo
Arduino Leonardo ETH                arduino:avr:leonardoeth
Arduino Mega ADK                    arduino:avr:megaADK
Arduino Mega or Mega 2560           arduino:avr:mega
Arduino Micro                       arduino:avr:micro
Arduino Mini                        arduino:avr:mini
Arduino NG or older                 arduino:avr:atmegang
Arduino Nano                        arduino:avr:nano
Arduino Pro or Pro Mini             arduino:avr:pro
Arduino Robot Control               arduino:avr:robotControl
Arduino Robot Motor                 arduino:avr:robotMotor
Arduino Uno                         arduino:avr:uno
Arduino Uno WiFi                    arduino:avr:unowifi
Arduino Yún                         arduino:avr:yun
Arduino Yún Mini                    arduino:avr:yunmini
LilyPad Arduino                     arduino:avr:lilypad
LilyPad Arduino USB                 arduino:avr:LilyPadUSB
Linino One                          arduino:avr:one
아두이노 클론 보드
중국산 클론의 경우는 자동 인식이 안됩니다. 클론 보드를 USB에 꽂은 다음 dmesg 명령으로 커널 로그를 보면, 아래와 같이 Arduino 글자가 보이지 않고, 저가형 시리얼 칩인 ch341 글자가 보입니다. arduino-cli board list를 해 보면 board name이 unknown으로 나오지요.
$ dmesg
[ 3059.826341] usbcore: registered new interface driver ch341
[ 3059.827087] usbserial: USB Serial support registered for ch341-uart
[ 3059.828153] ch341 1-1:1.0: ch341-uart converter detected
[ 3059.828944] usb 1-1: ch341-uart converter now attached to ttyUSB0

$ arduino-cli board list      # Check the connection to the board
Port         Type              Board Name              FQBN                 Core
/dev/ttyUSB0 Serial Port (USB) Unknown
자동 인식이 안된다고 해서 사용을 못하는 것은 아니니, 걱정할 필요는 없습니다. ch340/ch341의 시리얼 포트는 /dev/ttyUSB0 또는 /dev/ttyUSB1 입니다. 그리고, 코어는 정품과 같습니다. 따라서, 정품의 경우와 동일하게 arduino-cli core install arduino:avr 명령으로 정품 보드용 코어를 설치하고, arduino-cli board listall 명령으로 설치된 코어를 확인합니다.
보드의 FQBN 알아내기
위에서, 중국산 클론 보드를 위해서는 FQBN을 지정해 주어야 한다고 했는데요. 내가 가지고 있는 보드의 fqbn 값을 어떻게 알아낼까요? 아두이노 기본 IDE를 이용하여 알아낼 수 있는 방법이 있습니다.
- 보드를 PC에 연결하고 아두이노 기본 IDE를 실행합니다.
- 파일 > 환경설정 > 다음 동작중 자세한 출력 보이기 > 컴파일을 체크합니다.
- 툴 > 보드 메뉴에서 보드를 지정합니다.
- 필요시 툴 > 프로세서에서 프로세서를 지정합니다. 필자가 가지고 있는 아두이노 나노 보드는 ATmeta328P (Old Bootloader)로 했습니다.
- 스케치 > 확인/컴파일을 합니다.
컴파일이 끝나면, 검은 바탕 컴파일 화면의 스크롤을 올려 맨 윗줄을 봅니다.
C:\Program Files (x86)\Arduino\arduino-builder -dump-prefs -logger=machine -hardware C:\Program Files (x86)\Arduino\hardware -tools C:\Program Files (x86)\Arduino\tools-builder -tools C:\Program Files (x86)\Arduino\hardware\tools\avr -built-in-libraries C:\Program Files (x86)\Arduino\libraries -libraries D:\Users\kjeom\Documents\Arduino\libraries -fqbn=arduino:avr:nano:cpu=atmega328old -vid-pid=1A86_7523 -ide-version=10812 -build-path C:\Users\kjeom\AppData\Local\Temp\arduino_build_337148 -warnings=none -build-cache C:\Users\kjeom\AppData\Local\Temp\arduino_cache_981687 -prefs=build.warn_data_percentage=75 -prefs=runtime.tools.avr-gcc.path=C:\Program Files (x86)\Arduino\hardware\tools\avr -prefs=runtime.tools.avr-gcc-7.3.0-atmel3.6.1-arduino5.path=C:\Program Files (x86)\Arduino\hardware\tools\avr -prefs=runtime.tools.avrdude.path=C:\Program Files (x86)\Arduino\hardware\tools\avr -prefs=runtime.tools.avrdude-6.3.0-arduino17.path=C:\Program Files (x86)\Arduino\hardware\tools\avr -prefs=runtime.tools.arduinoOTA.path=C:\Program Files (x86)\Arduino\hardware\tools\avr -prefs=runtime.tools.arduinoOTA-1.3.0.path=C:\Program Files (x86)\Arduino\hardware\tools\avr -verbose D:\temp\sketch_apr17a\sketch_apr17a.ino
위와 같이 긴 줄이 있는데, 중간에 -fqbn=arduino:avr:nano:cpu=atmega328old 이런 부분이 보이죠. arduino:avr:nano:cpu=atmega328old가 바로 내가 가지고 있는 보드의 FQBN 값입니다.
참고로, 필자가 가지고 있는 보드의 fqbn은 다음과 같습니다.
| 보드 | FQBN | 시리얼 포트 |
|---|---|---|
| 아두이노 우노 정품 | arduino:avr:uno | /dev/ttyACM0 |
| 아두이노 우노 클론 | arduino:avr:uno | /dev/ttyUSB0 |
| 아두이노 나노 클론 | arduino:avr:nano:cpu=atmega328old | /dev/ttyUSB0 |
| ESP32 | esp32:esp32:esp32 | /dev/ttyUSB0 |
테스트해 보기
이제, 테스트용으로 간단한 아두이노 스케치를 작성하고 업로드를 해 봅시다.
$ mkdir sketch/
$ vi sketch/sketch.ino        # create sketch.ino

------------ 아래 내용을 입력 ---------------
void setup() {
  pinMode(LED_BUILTIN, OUTPUT);
  Serial.begin(115200);
  Serial.println("start...");
}

void loop() {
  digitalWrite(LED_BUILTIN, HIGH);
  Serial.println("H");
  delay(1000);
  digitalWrite(LED_BUILTIN, LOW);
  Serial.println("L");
  delay(1000);
}
---------------------------

$ ls -Al sketch/           # sketch.ino is created
total 4
-rw-r--r-- 1 rostude rostude 175 Apr 16 10:25 sketch.ino
스케치를 컴파일하고 업로드하기
컴파일은 arduino-cli compile 명령으로 하고, 업로드는 arduino-cli upload 명령으로 합니다.
- 연결되어 있는 보드에 알맞는 fqbn 파라미터를 주어야 합니다.
- 컴파일은 소스코드가 들어있는 디렉토리의 부모 디렉토리에서 실행합니다.
- 업로드 시에는 아두이노가 연결되어 있는 시리얼 포트도 맞게 지정해 주어야 합니다.
.elf나 .hex로 끝나는 파일이 컴파일된 결과 입니다.
$ arduino-cli compile --fqbn arduino:avr:uno sketch/          # Compile 'sketch' directory
$ arduino-cli compile --fqbn arduino:avr:nano:cpu=atmega328old sketch/          # Compile 'sketch' directory for nano with ATmega328P (Old Bootloader)
Sketch uses 924 bytes (2%) of program storage space. Maximum is 32256 bytes.
Global variables use 9 bytes (0%) of dynamic memory, leaving 2039 bytes for local variables. Maximum is 2048 bytes.

$ ls -Al sketch/         # .elf, .hex 파일이 생성되었음
total 28
-rw-r--r-- 1 rostude rostude   175 Apr 16 10:25 sketch.ino
-rwxrwxr-x 1 rostude rostude 14112 Apr 17 16:11 sketch.ino.arduino.avr.uno.elf*
-rw-rw-r-- 1 rostude rostude  2615 Apr 17 16:11 sketch.ino.arduino.avr.uno.hex
-rw-r--r-- 1 rostude rostude  3976 Apr 17 16:11 sketch.ino.arduino.avr.uno.with_bootloader.hex

$ arduino-cli upload -p /dev/ttyACM0 --fqbn arduino:avr:uno sketch/    # upload the sketch
$ arduino-cli upload -p /dev/ttyUSB0 --fqbn arduino:avr:nano:cpu=atmega328old sketch/      # for nano with ATmega328P (Old Bootloader)
아래와 같이 -u 옵션을 사용하면 컴파일과 업로드를 동시에 할 수 있습니다.
$ arduino-cli compile --fqbn arduino:avr:uno -u -p /dev/ttyACM0 sketch/ # 컴파일에 성공하면 업로드까지 함
업로드가 성공하면 위에서 작성한 코드 대로 아두이노의 내장 LED가 1초 간격으로 켜졌다 꺼졌다를 반복할 것입니다.
컴파일의 중간 파일 지우기
컴파일 과정의 중간 파일은 /tmp 디렉토리에 저장됩니다. 소스 파일 이름을 바꾸거나 하면 간혹 컴파일러가 오동작하는 경우가 있는데요. 이 때는 /tmp/arduino-로 시작하는 디렉토리를 지우고 다시 컴파일하면 됩니다.
$ rm -rf /tmp/arduino-*
시리얼 포트로 디버깅
임베디드 기기 개발에서 시리얼 입출력은 필수로 사용되는 디버깅 방법이죠. Arduino CLI는 컴파일/업로드 툴이므로, 시리얼 포트 입출력을 지원하지는 않습니다. 대신에 minicom같은 일반적인 시리얼 콘솔 프로그램을 사용할 수 있습니다.
하지만 여기에서는 더 간단하게 cat 명령으로 시리얼 출력을 보고 echo 명령으로 시리얼 입력을 하는 방법을 설명합니다.
시리얼 포트 입출력
먼저 아래와 같이 stty 명령으로 시리얼 포트를 설정합니다. 위 예제에서 Serial.begin(115200) 이렇게 시리얼 포트의 baud rate를 115200으로 했으므로, stty 명령에도 115200을 지정합니다. 이 작업은 아두이노를 연결한 후 한번만 해 주면 됩니다.
$ stty -F /dev/ttyUSB0 cs8 115200 ignbrk -brkint -icrnl -imaxbel -opost -onlcr -isig -icanon -iexten -echo -echoe -echok -echoctl -echoke noflsh -ixon -crtscts
그 다음, cat 명령으로 아두이노의 시리얼 출력을 볼 수 있습니다. 아래에서는 우리가 작성한 코드대로 start...가 출력되고 H와 L이 1초 간격으로 출력되는 것을 볼 수 있습니다. 시리얼 출력을 그만 보고 싶으면 ^C를 누릅니다.
$ cat /dev/ttyUSB0
start...
H
L
H
L
H
...
^C
아두이노에 문자를 입력하고 싶으면 터미널을 하나 더 열고 아래와 같이 echo 명령을 이용합니다.
$ echo "Hello Arduino" > /dev/ttyUSB0  # 맨 뒤에 줄바꿈 문자가 추가됩니다.
$ echo -n "H" > /dev/ttyUSB0           # -n 옵션을 주면 줄바꿈 문자 없이 'H'만 전송됩니다.
코드 업로드시 주의사항
Arduino CLI는 컴파일된 코드를 업로드 할 때 시리얼 포트를 이용하므로, 업로드를 하고 싶으면 위에서 cat 명령을 내린 터미널에서 ^C를 눌러 cat 명령을 종료해야 합니다.
Library 추가하기
아두이노에 공개된 라이브러리는 arduino-cli lib search 명령으로 검색하고 arduino-cli lib install 명령으로 추가합니다.
다음은 적외선 리모콘 신호를 수신하는 IRremote 라이브러리를 검색하고 설치하는 예 입니다.
$ arduino-cli lib search IRremote     # IRremote 글자가 들어가는 라이브러리 검색
Name: "DL_PAC_NK76"
  Author: Quadrifoglio Verde <quadrifoglio@protonmail.com>
  Maintainer: Quadrifoglio Verde <quadrifoglio@protonmail.com>
  Sentence: Arduino library for remote control DeLonghi PAC NK76
  Paragraph: Remote control for Air Conditioner DeLonghi PAC NK76 over IR, IRremote library required!
  Website: https://github.com/QuadrifoglioVerde/DL_PAC_NK76
  Category: Device Control
  Architecture: *
  Types: Contributed
  Versions: [1.0.0, 1.0.1]
  Provides includes: DL_PAC_NK76.h
  Dependencies: IRremote
Name: "IRRemoteControl"
  Author: Cristiano Borges
  Maintainer: Cristiano Borges <https://github.com/cristborges>
  Sentence: A lightweight library for send/receive infra-red signal.
  Paragraph: This library seeks to be lean and intend to make it easier to send/receive infra-red signals. As an extra feature, the library can read codes from flash memory.
  Website: https://github.com/cristborges/IRRemoteControl
  Category: Signal Input/Output
  Architecture: *
  Types: Contributed
  Versions: [1.0.0]
Name: "IRremote"
  Author: shirriff
  Maintainer: shirriff
  Sentence: Send and receive infrared signals with multiple protocols
  Paragraph: Send and receive infrared signals with multiple protocols
  Website: https://github.com/shirriff/Arduino-IRremote.git
  Category: Signal Input/Output
  Architecture: *
  Types: Contributed
  Versions: [1.0.0, 2.0.1, 2.2.3]

...

$ arduino-cli lib install IRremote     # IRremote 라이브러리 설치
IRremote depends on IRremote@2.2.3
Downloading IRremote@2.2.3...
IRremote@2.2.3 already downloaded
Installing IRremote@2.2.3...
Installed IRremote@2.2.3
설치된 라이브러리는 ~/Arduino/libraries 디렉토리에 저장됩니다. 제 PC에는 아래와 같이, arduino-cli로 추가한 IRremote 라이브러리와 수동으로 추가한 I2Cdev, MPU6050 라이브러리가 있네요.
$ ls ~/Arduino/libraries/
I2Cdev/  IRremote/  MPU6050/
- 수동으로 라이브러리를 추가하고 싶으면 이 디렉토리에 라이브러리를 복사하면 됩니다.
- 설치된 라이브러리를 삭제하고 싶으면 이 디렉토리에 있는 라이브러리 디렉토리를 지우면 됩니다.
ESP8266, ESP32 지원
ESP8266은 WIFI를 지원하고 Arduino보다 월등히 좋은 성능을 가진 칩이고, ESP32는 ESP8266의 확장판으로, dual core, BLE 등이 내장된 칩으로, IoT 프로토타이핑에 많이 사용됩니다. Arduino-CLI로 ESP8266이나 ESP32 보드도 개발할 수 있습니다.
arduino-cli.yaml 편집
~/.arduino15/arduino-cli.yaml을 열고, additional_urls 항목에 아래와 같이 두 개 사이트를 추가합니다.
board_manager:
  additional_urls:
    - https://arduino.esp8266.com/stable/package_esp8266com_index.json
    - https://raw.githubusercontent.com/espressif/arduino-esp32/gh-pages/package_esp32_index.json
아래 명령으로 platform index를 업데이트 합니다.
$ arduino-cli core update-index
ESP8266, ESP32 코어 설치
아래 명령으로 ESP8266과 ESP32의 코어를 설치합니다.
$ arduino-cli core install esp8266:esp8266
$ arduino-cli core install esp32:esp32
아래 명령으로 설치된 것을 확인합니다. ESP32, ESP8266 칩을 이용한 보드가 여러 종류 나오네요.
$ arduino-cli board listall
Board Name                       FQBN
...
ESP32 Dev Module                 esp32:esp32:esp32
ESP32 FM DevKit                  esp32:esp32:fm-devkit
ESP32 Pico Kit                   esp32:esp32:pico32
ESP32 Wrover Module              esp32:esp32:esp32wrover
ESP32vn IoT Uno                  esp32:esp32:esp32vn-iot-uno
ESPDuino (ESP-13 Module)         esp8266:esp8266:espduino
ESPea32                          esp32:esp32:espea32
ESPectro Core                    esp8266:esp8266:espectro
ESPectro32                       esp32:esp32:espectro32
ESPino (ESP-12 Module)           esp8266:esp8266:espino
...
필자가 가지고 있는 ESP-WROOM-32 개발보드 (WIFI+BLE)에서는 –fqbn esp32:esp32:esp32를 사용하여 컴파일과 업로드를 할 수 있었습니다.
arduino-cli compile --fqbn esp32:esp32:esp32 serial/
arduino-cli upload -p /dev/ttyUSB0 --fqbn esp32:esp32:esp32 serial/
시리얼 드라이버 설치
ESP32 보드는 아마 CP2102 시리얼 칩을 사용했을 것입니다. 이 칩의 드라이버를 아래 사이트에서 다운로드 받아서 설치합니다. https://www.silabs.com/developers/usb-to-uart-bridge-vcp-drivers
Reference
글을 쓰는 2020년 5월 10일 현재, Arduino CLI는 계속 개발중이고 아직 1.0 버전이 나오지 않은 상태입니다. 가장 최신의 정보는 아래 사이트에서 얻을 수 있습니다.