COCO Dataset - 코코 데이터셋
머신러닝을 위해 많은 데이터 셋이 만들어져 있는데, 그 중에 COCO dataset은 object detection, segmentation, keypoint detection 등을 위한 데이터셋으로, 매년 다른 데이터셋으로 전 세계의 여러 대학/기업이 참가하는 대회에 사용되고 있습니다. 구글이 공개한 TensorFlow Object Detection API에도 COCO dataset으로 학습시킨 모델이 들어있습니다. 이 COCO dataset과 이것을 다루기 위한 COCO API에 대해 알아보겠습니다.
Download COCO Dataset
COCO dataset은 많은 그림 파일을 가지고 있으므로, 용량이 GB 단위로 큽니다. 그래서, gsutil (Google Storage 유틸리티)을 사용하여 다운로드 받는 방법이 권장됩니다. 먼저 아래와 같이 gsutil을 설치합니다.
$ sudo apt install curl
$ curl https://sdk.cloud.google.com | bash
$ source ~/.bashrc
그 다음, image data와 annotation data를 다운로드 받습니다. 아래 예는 val2017 데이터를 다운받는 예인데요. val2017 말고 다른 데이터도 다운 받을 수 있습니다. 다운 받을수 있는 데이터셋의 종류는 http://cocodataset.org/#download를 참고하세요.
$ cd ~/work
$ mkdir cocodataset
$ cd cocodataset
$ mkdir val2017
$ gsutil -m rsync gs://images.cocodataset.org/val2017 val2017
$ mkdir anns
$ gsutil -m rsync gs://images.cocodataset.org/annotations anns
$ cd val2017
$ unzip ../anns/annotations_trainval2017.zip
COCO Dataset의 구성
위와 같이 다운로드를 받았다면 val2017 디렉토리를 살펴보세요.
$ ls
000000000139.jpg  000000098018.jpg  000000190307.jpg  000000289702.jpg
000000384666.jpg  000000481413.jpg  000000000285.jpg  000000098261.jpg
000000190637.jpg  000000289741.jpg  000000384670.jpg  000000481480.jpg
...
$ ls annotations
captions_train2017.json  instances_train2017.json  person_keypoints_train2017.json
captions_val2017.json    instances_val2017.json    person_keypoints_val2017.json
val2017에는 5000장의 jpg 파일이 있습니다. (다른 데이터셋에는 더 많은 jpg 파일이 있습니다.) 그리고, annotations 디렉토리에는 6개의 json 파일이 있는데요. Training, validation 별로 captions, instances, person_keypoints 파일이 있습니다. 이것들은 각각
- captions - 텍스트로 된 그림에 대한 설명
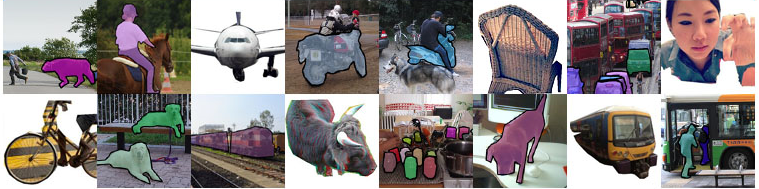
- instances - 그림에 있는 사람/사물에 대한 category와 영역 mask
- person_keypoint - 사람의 자세 데이터 를 가지고 있습니다.
Annotation 파일 분석
Annotation 파일은 한 줄짜리 json 형식으로 되어 있습니다. 혹시라도, 이 파일을 그냥 vi로 열면 안됩니다. 수백메가 크기의 한 줄 짜리 파일이라, vi가 감당을 못합니다. 그래서, json beautifier를 이용하여 줄바꿈을 해 주어야 분석이 쉽습니다.
https://stedolan.github.io/jq/에서 jq binary를 다운로드 받습니다. 저는 64-bit Ubuntu용으로 다운로드 받아서, 파일 이름이 jq-linux64 네요. 그 다음,
$ jq-linux64 . instances_val2017.json > instances_val2017.beautified.json
이와 같이 하면 줄바꿈이 적용된 JSON 파일인 instances_val2017.beautified.json 파일이 생성됩니다.
이 중에서 instances에 대해 좀 더 자세히 알아보겠습니다.
Instances json file
Instances json file의 첫 부분은 아래와 같이 information과 license의 종류에 대한 내용입니다.
{
  "info": {
    "description": "COCO 2017 Dataset",
    "url": "http://cocodataset.org",
    "version": "1.0",
    "year": 2017,
    "contributor": "COCO Consortium",
    "date_created": "2017/09/01"
  },
  "licenses": [
    {
      "url": "http://creativecommons.org/licenses/by-nc-sa/2.0/",
      "id": 1,
      "name": "Attribution-NonCommercial-ShareAlike License"
    },
    ...
  ],
그 다음엔, 그림 파일에 대한 내용이 나옵니다.
  "images": [
    ...
    {
      "license": 1,
      "file_name": "000000324158.jpg",
      "coco_url": "http://images.cocodataset.org/val2017/000000324158.jpg",
      "height": 334,
      "width": 500,
      "date_captured": "2013-11-19 23:54:06",
      "flickr_url": "http://farm1.staticflickr.com/169/417836491_5bf8762150_z.jpg",
      "id": 324158
    },
    ...
  ],
그 다음엔, 각 그림에 대한 annotation 정보가 나옵니다. Annotation이란, 그림에 있는 사물/사람의 segmentation mask와 box 영역, 카테고리 등의 정보를 말합니다. 아래 예는 COCO API Demo에서 사용된 image인 324159 그림의 annotation 중 일부 입니다.

  "annotations": [
    ...
    {
      "segmentation": [
        [
          216.7,
          211.89,
          216.16,
          217.81,
          215.89,
          220.77,

          ...
          212.16
        ]
      ],
      "area": 759.3375500000002,
      "iscrowd": 0,
      "image_id": 324158,
      "bbox": [
        196.51,
        183.36,
        23.95,
        53.02
      ],
      "category_id": 18,
      "id": 10673
    },
    ...
    {
      "segmentation": [
        [
          44.2,
          167.74,
          48.39,
          162.71,
          ...
          167.58
        ]
      ],
      "area": 331.9790999999998,
      "iscrowd": 0,
      "image_id": 324158,
      "bbox": [
        44.2,
        161.19,
        36.78,
        13.78
      ],
      "category_id": 3,
      "id": 345846
    },
    ...
  ],
마지막으로, category 리스트가 나옵니다.
  "categories": [
    {
      "supercategory": "person",
      "id": 1,
      "name": "person"
    },
    ...
  ]
}
Install COCO API
COCO dataset의 image와 annotation을 쉽게 다루기 위한 API가 COCO API 입니다. 다음과 같이 COCO API를 다운 받고 컴파일 합니다.
(py3) $ pip install cython
$ cd ~/work
$ git clone https://github.com/cocodataset/cocoapi.git
$ cd cocoapi/PythonAPI
$ make
$ echo 'export PYTHONPATH=$PYTHONPATH:'`pwd` >> ~/.bashrc
COCO API의 설명과 사용 방법은 http://cocodataset.org/#download에서 더 자세히 알 수 있습니다.
COCO Dataset을 다운로드 받아 보시고, https://github.com/cocodataset/cocoapi/blob/master/PythonAPI/pycocoDemo.ipynb에서 COCO API가 어떻게 동작하는지 알아보세요.
참고로, 아래는 pycocoDemo.ipynb에서 사용되는 python package를 설치하는 방법입니다.
(py3) $ pip install numpy
(py3) $ pip install scikit-image
(py3) $ pip install matplotlib